What is an SVG?
1. “Scalable Vector Graphic”
File types you will commonly know are JPG, GIF, PNG, but SVG’s are a completely different ball game.
Has many advantages over standard images, can be scaled up or down as needed but not degrade in quality – allowing re-usage of the image without exporting different sizes.
Use vector tools
Creating SVG’s can be done using some of the great vector tools out there like illustrator, alternatively you can download vector illustrations from sources like shutterstock.com or stock.adobe.com
Let us look at the other advantages of SVG.
2. SVG loading times
Website speed is important – giving people a great experience rendering a page quickly, and the less HTTP requests for a page, the better, plus Google loves fast responsive websites.
SVG’s low file size
SVG’s reduce the file size compared with for PNG files. They export as a low size and are great for illustrations and icons.
Exporting large illustrations with tons of paths and shapes, could be quite large. Using SVG’s should be something everyone should do nowadays when used appropriately.
3. SVG Animations
SVG’s are great for animation because they are scalable, and animating or by hovering does not reduce image quality.
Also using a method of exporting in code, allows you to highlight specific elements of the image to use for animation – here is a basic file I created in code with animation.
This code shows a polygon shape with a background, that when hovered animates to a different shape, this shows the power of SVG files which could not be done with normal png files.
See the Pen
SVG Polygon Animation by Simon (@steade103)
on CodePen.
4. Exporting SVG’s
You can export SVG with Adobe Illustrator, or an alternative such as Sketch, Inkscape, GIMP and SVG-Edit.
You can create and then export shapes or full illustrations, for example – I have created this illustration of a man’s head using Adobe illustrator and using this random graphic.
As this illustration is much more complex than creating a basic shape, we will need to prepare the file correctly to export it in a reduced SVG file size.
Exported Example

Prepare your SVG file
Option 1: Export the SVG File to code
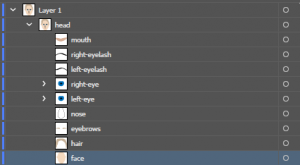
If using SVG as the direct code to use in a project, you will need to prepare the layers this way to take control of each part in the code. This then creates each layer as an #id so you can interact with each part.
Notice I have divided each part to its own layer to give the most options to control.

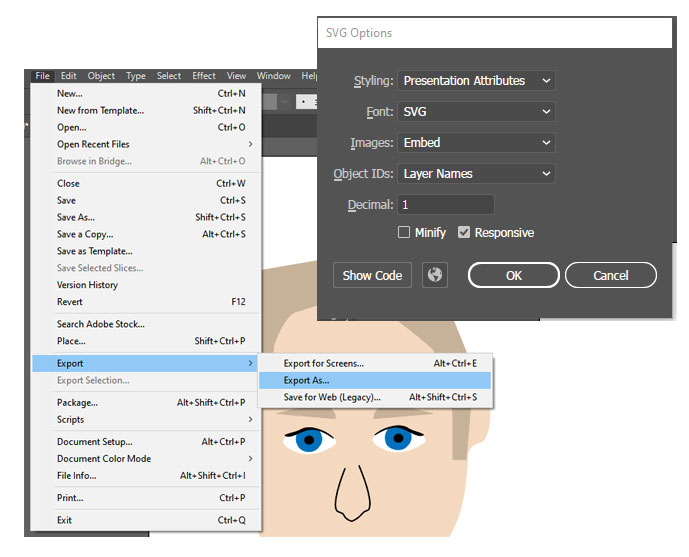
How to export SVG code from Illustrator
- Select the illustration
- Goto File > export as, click save and you will be presented with this window
- Click “Show Code”
- Copy code and paste into your HTML

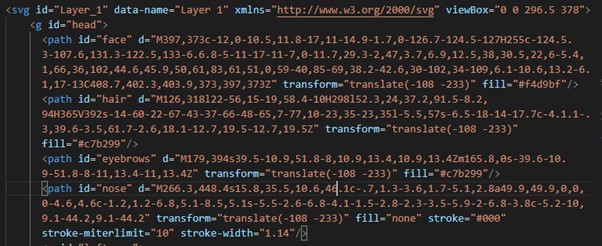
Once you have exported the file and pasted into your HTML, the code is sometimes huge. This can be the issue with SVG’s when looking at them in the code, which is why compressing SVG’s using tools like SVG Minify or compressor can help.
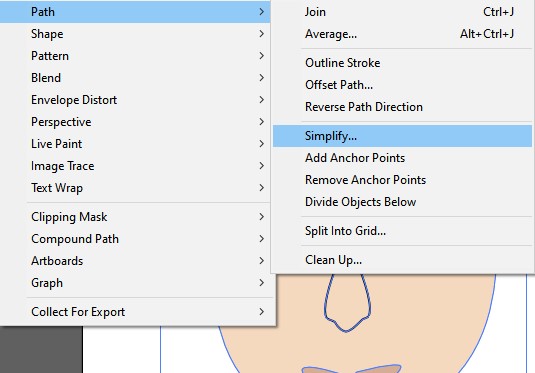
You can also reduce the size of your illustration paths by:
- Converting them to a compound path which combines objects various shapes or paths together – hence reducing the overall paths
- Simplify your paths – Go to object > path > Simplify then reduce the amount of paths needed as long as vector looks remains.

Once you have the code, you can change the colour, movement etc of each given I’d, which is why when we export we prepare the SVG in the following way so each section is in each layer, so if I wanted the eyes to blink or change colour, I can focus on the element I’d and animate each part needed.

Option 2: Save SVG as a file
The second way is to save export as and just using svg without the code. This still scales images etc using <img src=“example.svg”>, but it will not allow you to plug into the image paths like the export for code version does.
5. Fun examples how to use SVG
Creating shapes on the fly
You may require some shape on your site such as an interactive button, this maybe ok to illustrate something. Here are 3 basic example SVG’s.
- SVG circle is great to use for an icon, or as a side effect.
- A coded hexagon which uses polygons in the code as in the above example – great for animated effects.
- Custom graphic exported as SVG code which works great for interactive animation.

I hope this has helped you understand the benefits of using SVG’s. If you’re unsure how to create and use SVG’s, speak to your graphic designer, or anyone who provides a web design service who can take creative ideas into a great end result.
Development